Kitchen renovations are massive undertakings that expose every hidden flaw in your home’s original layout. We see this reality play out daily across the GTA. A well-planned project runs predictably, while rushed jobs easily blow past budgets and deadlines.
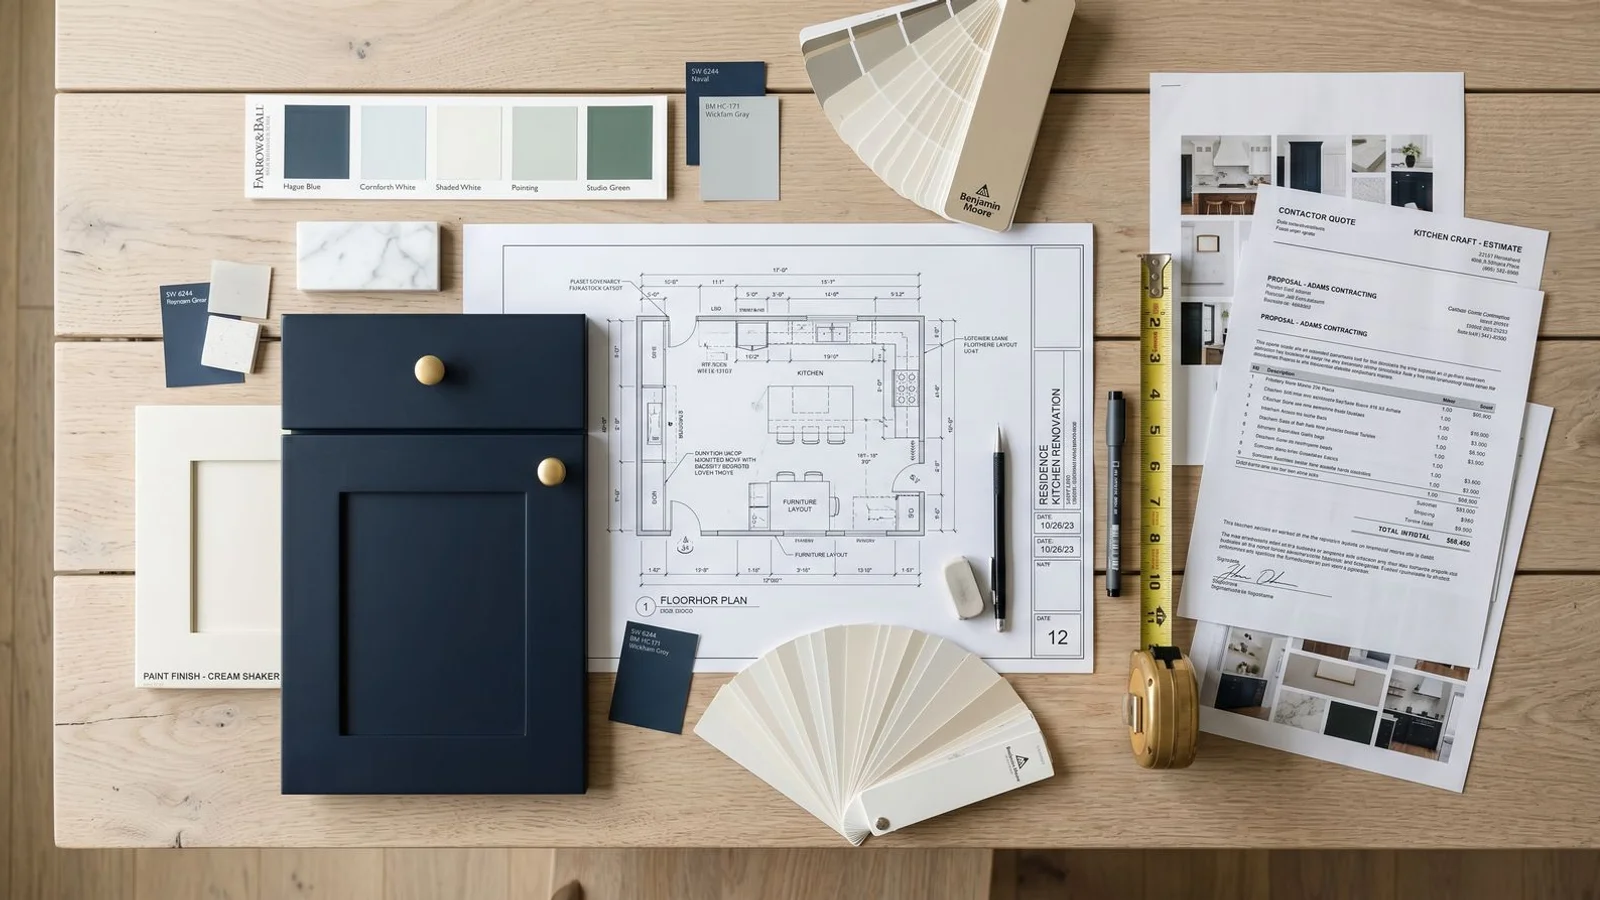
The most important step is creating a comprehensive kitchen reno planning checklist before a single wall comes down.
This guide breaks down the seven essential planning steps every homeowner should follow to protect their investment. You will learn exactly what to prepare before signing a construction contract.
Step 1: Set a realistic budget against the Toronto market
Toronto kitchen renovation prices in 2026 look very different from just a few years ago. Mid-range projects generally cost between $30,000 and $65,000 across the GTA.
We analyze local market data continuously to keep our estimates accurate. Recent reports from Toronto design firms show full custom projects routinely crossing the $75,000 mark.
Here is a breakdown of typical 2026 price ranges for the GTA:
| Project Scope | Estimated Cost | Typical Inclusions |
|---|---|---|
| Small refresh | $15,000 - $25,000 | Cabinets, counters, layout stays the same |
| Downtown condo | $20,000 - $40,000 | Space-saving layouts, custom storage |
| Mid-range full renovation | $30,000 - $65,000 | New cabinets, appliances, layout tweaks |
| High-end custom | $65,000 - $100,000+ | Custom millwork, premium surfaces, layout changes |
Our team always recommends padding your budget by 10 to 15 percent for contingencies. Older pre-1980 homes often hide knob-and-tube wiring, plumbing surprises, or rotted subfloors.
You must also account for the 13 percent HST on all labor and materials. Condo owners should budget for $500 to $1,000 in elevator booking deposits required by most property management boards.
Step 2: Define needs vs. wants on your kitchen reno planning checklist
This is the exact conversation we run at every initial consultation. Two columns on a piece of paper clarify your true priorities quickly.
Separate the Essentials from the Upgrades
- Needs: what is broken, what is missing, and what blocks the daily use of your space.
- Wants: what would be nice, what feels aspirational, and what you would add if the budget allowed.
Be completely honest about your lifestyle. Most homeowners actually require fewer than four core needs for a functional space. These usually include better counter prep space, more storage, working appliances, or an open layout.
Our clients often find their wants list is much longer. Knowing the difference lets you trim non-essentials later when premium material choices push the budget limit.
Check City of Toronto Permit Requirements
Your needs list will directly dictate whether you must pull municipal permits. We always verify structural plans before finalizing any design. The City of Toronto requires a building permit if your renovation involves moving structural walls, relocating plumbing lines, or making HVAC changes.
Electrical upgrades need a separate permit from the Electrical Safety Authority (ESA). Cosmetic updates like painting, swapping floors, or replacing cabinets in the exact same footprint do not require a permit.
Step 3: Gather inspiration locally and online
Inspiration serves as the essential fuel for your design phase. We recommend pulling ideas from a mix of digital platforms and physical showrooms around the city.
Best Resources for Toronto Homeowners
- Houzz: Search for Toronto-specific portfolios to see local examples.
- Pinterest: Create boards organized by your preferred style direction.
- Castlefield Design District: Visit physical showrooms like AyA Kitchens or Muti Kitchen & Bath to see materials in person.
- Designer Instagram accounts: Follow NKBA-credentialed Toronto designers who post completed work routinely.
- Neighbourhood walkthroughs: Open houses provide a free way to see finished layouts at scale.
Our designers suggest saving 20 to 30 images that share a common thread. Look for consistent door styles, hardware finishes, or specific layout ideas.
Bring this curated collection to your initial consultation. The best project brief is always a visual one.
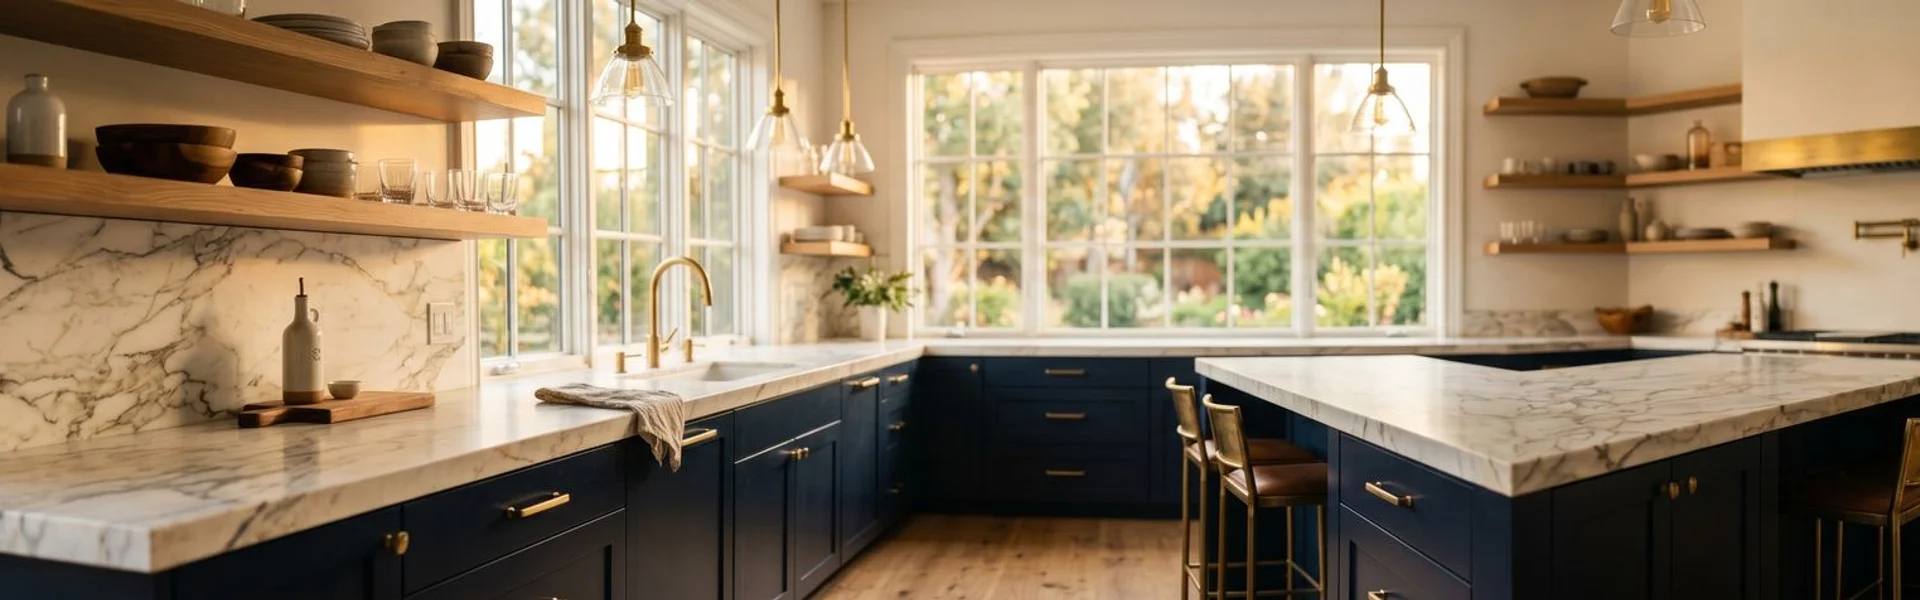
Step 4: Choose your layout direction
Five main layouts cover roughly 95 percent of all Toronto kitchens. You do not need to lock in a final layout before your consultation.
Knowing which directions work best in your specific footprint saves massive amounts of time during the design phase. This early decision helps narrow down your functional zones.
Standard Kitchen Configurations
- Galley: Ideal for narrow spaces, downtown condos, and small townhomes using two parallel runs.
- L-shape: The most common layout found in Toronto detached and semi-detached homes.
- U-shape: Perfect for busy families requiring maximum storage and counter space.
- Island: Best suited for open-concept layouts and larger properties.
- Peninsula: Gives smaller spaces an island feel without demanding the required floor footprint.
Factor in Clearance Requirements
We rigorously follow National Kitchen and Bath Association (NKBA) guidelines for all our floorplans. Space planning is critical for safety and daily function. If you want an island, you must leave a minimum of 42 inches of clearance for a single cook.
Homes with multiple cooks need 48 inches of walkway space. A 36-inch aisle is the absolute bare minimum for safe passage, but this tight spacing causes immediate bottleneck issues if someone opens the dishwasher or oven door.
Step 5: Material and finish shortlist
Cabinet styles and materials form the foundation of every successful project. We work primarily across four distinct style categories to match the local architecture.
- Traditional: Features raised panels, ornate moulding, and painted or stained finishes.
- Transitional: Uses shaker doors and clean reveals as the dominant choice across the GTA.
- Modern: Showcases slab doors, minimal hardware, and high-gloss lacquer finishes.
- Contemporary: Highlights handleless designs, ceiling-height storage, and integrated appliances.
Our standard for premium builds includes plywood cabinet boxes paired with solid wood doors. Painted MDF doors are actually superior for solid colours in this climate. The MDF resists warping and prevents the paint cracking that solid wood experiences during Toronto’s extreme winter humidity swings.
Selecting Your Surfaces
| Surface Type | Best Use Case | Key Benefit |
|---|---|---|
| Quartz | High-traffic family homes | Extremely durable and stain-resistant |
| Granite | Traditional designs | Unique natural patterns and heat resistance |
| Marble | Premium luxury projects | Unmatched aesthetic appeal |
We see quartz dominating the local market right now. Brands like Caesarstone and HanStone offer excellent Canadian-made options that handle daily wear beautifully. Your backsplash usually consists of tile, a solid stone slab, or an extension of your primary counter material.
Step 6: Hire the right team
You are hiring a team for three distinct functions: design, project management, and execution. We find the cleanest and most efficient model is a single design-build firm that handles all three phases.
There are several mandatory credentials you must verify before signing a contract. Treat this vetting process like a formal job interview.
Contractor Verification Checklist
- Licensed: Ensure they hold a valid Municipal Licensing and Standards license with the City of Toronto.
- Insured: Ask for current commercial liability coverage and active WSIB clearance certificates.
- Credentials: Look for an NKBA-credentialed designer on staff if layout quality matters to you.
- Contracts: Demand fixed-price contracts as the standard operating model.
- Reviews: Check verified reviews on Google and HomeStars.
- Portfolio: Request photos of recent, completed projects specifically within Toronto.
Our project managers welcome detailed questions during the vetting process. Ask what exactly is included in the fixed-price quote and how the team handles out-of-scope discoveries. You should also clarify whether fabrication and installation are handled in-house and ask for a detailed breakdown of the warranty coverage.
Step 7: Plan the disruption
You will be without a fully functional cooking space for four to eight weeks during the on-site phase. We always warn clients that the project timeline begins long before the physical work starts. Custom cabinets typically require a 6 to 12-week lead time for manufacturing.
Demolition only begins once all primary materials arrive at the warehouse. This ensures your home is not torn apart while waiting for delayed shipments.
Setting Up a Temporary Prep Area
- Clear off counter space in a dining room or basement.
- Set up a microwave, kettle, mini-fridge, and toaster oven.
- Stock up on paper plates and disposable cutlery to save you from washing dishes in a bathroom sink.
- Plan easy meals specifically for the demolition week, as this is the messiest phase.
- Keep a few nearby neighbourhood restaurants on speed dial for the hardest days.
Our downtown clients sometimes choose to live elsewhere during the roughest installation windows. The temporary setup is usually sufficient for most suburban families willing to treat the experience like an indoor camping trip.
Ready to start?
A proper consultation walks through all seven of these planning steps in about 60 to 90 minutes. We come directly to your home, measure the space, and talk through your most urgent priorities. Within one week, our team returns with accurate layout options, a 3D rendering, and a comprehensive fixed-price quote.
Book a free in-home consultation to start checking off items on your kitchen reno planning checklist today, or browse our kitchen design service for design-only engagements.
You deserve a beautiful space that makes daily cooking a joy.
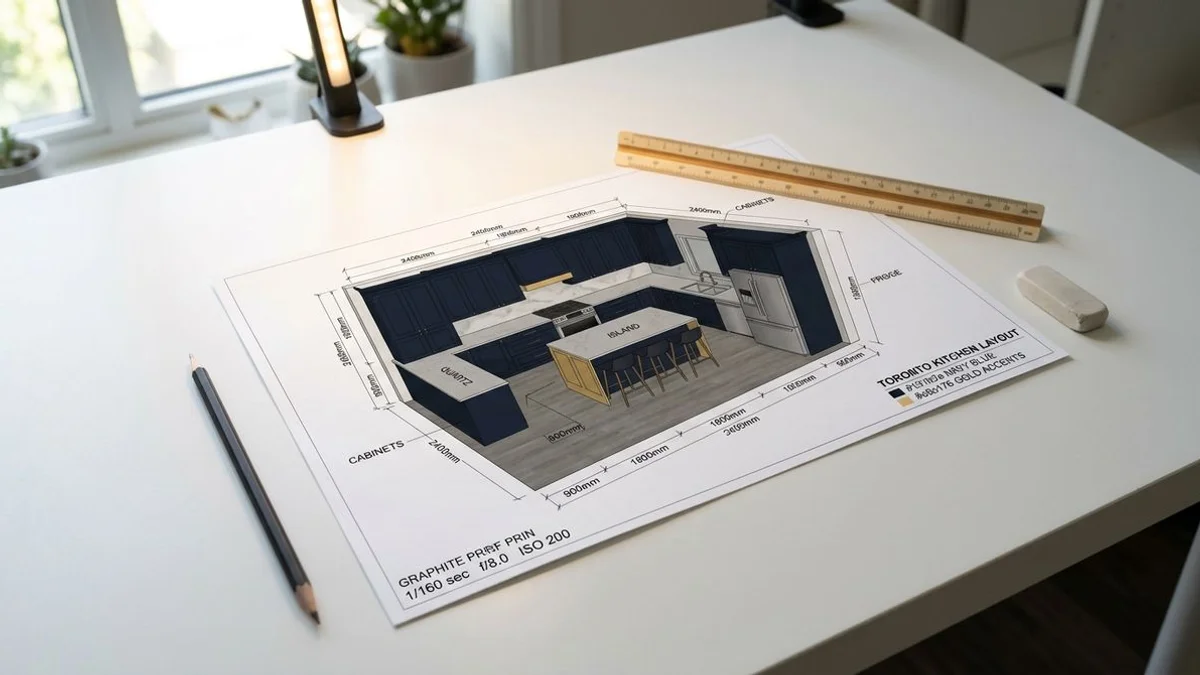
3D rendering of a planned kitchen layout with annotations